What A Match!
When I first decided to write a ray tracer, I turned to Ray Tracing in One Weekend, a classic starting point for anyone exploring the fundamentals of ray tracing. The goal was simple: implement the basic concepts of ray tracing to produce beautiful images while simultaneously learning Rust, a language I was eager to explore. The result is a minimalist yet robust ray tracer that not only deepened my understanding of graphics programming but also showcased Rust’s power for high-performance computation.
Why Ray Tracing?
Ray tracing has always fascinated me because of how beautifully it simulates the way light behaves — bouncing, refracting, and casting shadows to create stunningly realistic images. As someone who’s always enjoyed physics, especially optics, I was drawn to the way ray tracing connects programming with the principles of light. It felt like the perfect way to explore my passion for both fields.
Why Rust?
Rust is a language designed for performance and safety, with features like memory safety without a garbage collector and excellent support for concurrent programming. These qualities make it an ideal choice for a computationally demanding project like a ray tracer. For me, this project was also an opportunity to familiarize myself with Rust’s ownership model, concurrency tools, and syntax.
Features of the Ray Tracer
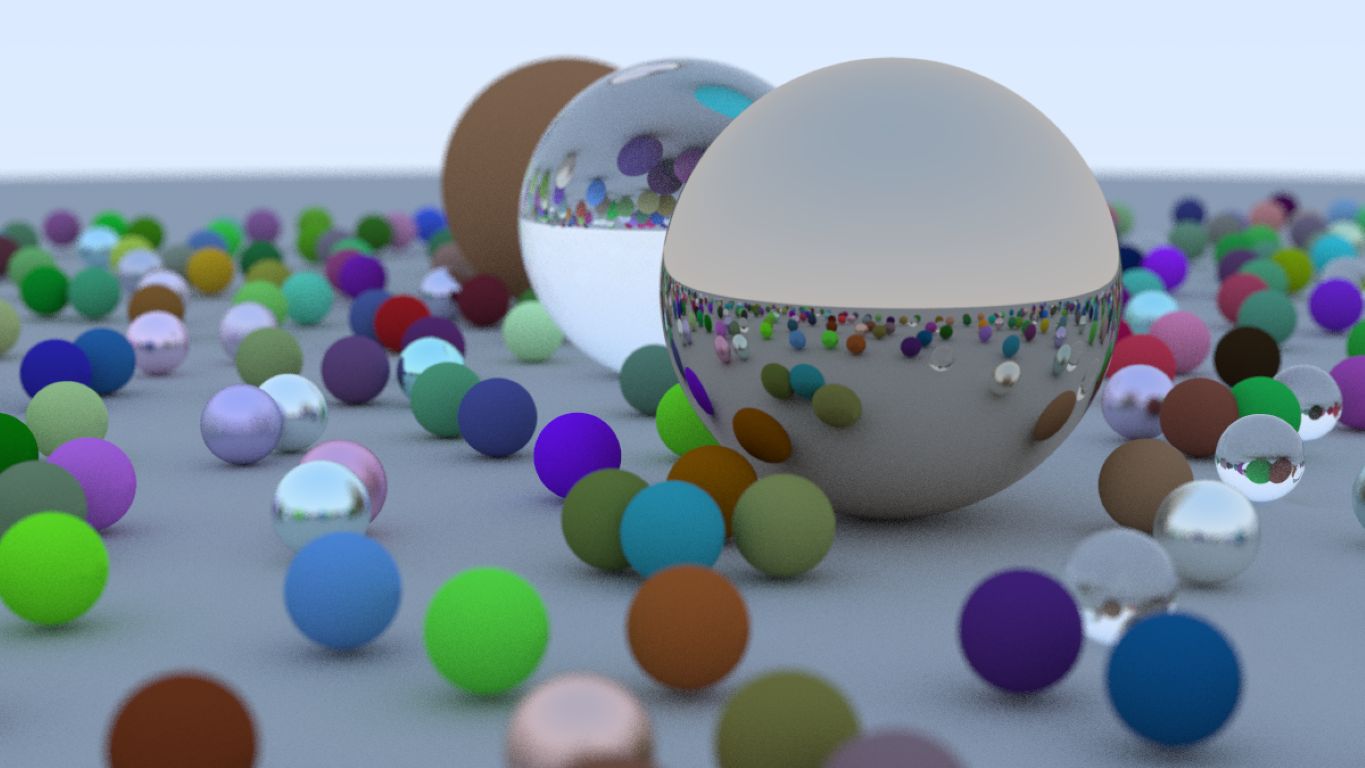
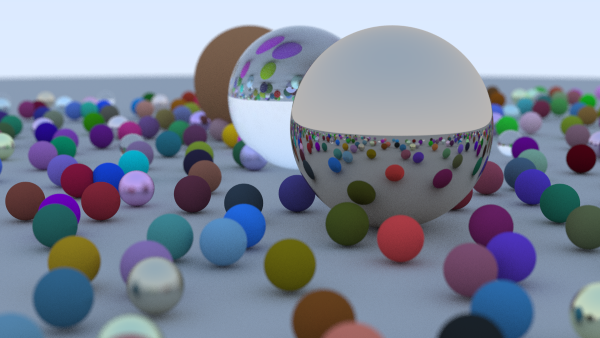
This project closely follows the first book in the Ray Tracing in One Weekend series, implementing foundational features such as:
-
Basic geometric shapes: The ray tracer supports spheres, which are rendered by calculating ray intersections.
-
Materials: Simple Lambertian (diffuse), metal, and dielectric (glass-like) materials are implemented.
-
Lighting: Includes ambient, diffuse, and reflective lighting for added realism.
-
Parallel execution: Rendering is parallelized to improve performance significantly.
A Welcome Addition: Parallel Execution
Rendering with ray tracing is computationally expensive because it involves shooting rays through each pixel and calculating their interactions with the scene. Fortunately, the process is highly parallelizable, as each pixel’s computation is independent of the others. Over the course of development, I explored different approaches to parallelizing the workload, and one key optimization provided a substantial performance boost.
First Approach: par_iter for samples
Initially, I parallelized the sample calculations for each ray. While this improved performance, the results weren’t as significant as I hoped.
pub fn render_parallel(
    &self,
    world: &(dyn Hittable + Sync + Send),
    image_data: &mut Vec<u8>
    ) {
    for j in 0..self.height() {
        for i in 0..self.width() {
            let pixel_color = (0..self.samples)
                .into_par_iter()
                .map(|_| {
                    let ray = self.get_ray(i, j);
                    ray.color(world, self.max_depth)
                })
                .reduce(|| (Vec3::zero()), |a, b| (a + b));
            self.write_pixel(&pixel_color, self.samples, image_data, (i, j));
        }
    }
}
A key limitation of this approach was that, as rendering progressed, the workload became unevenly distributed. This method created more opportunities for the cores to sit idle, waiting for the remaining ones to finish their work before moving on to the next pixel. This inefficiency would add up with each computed pixel, leading to a lot of wasted time over the course of the render.
Second Approach: par_iter for image row
By switching to parallelizing pixel calculations, I avoided this issue.
pub fn render_parallel(
    &self,
    world: &(dyn Hittable + Sync + Send),
    image_data: &mut Vec<u8>
    ) {
    for j in 0..self.height() {
        let mutex = Mutex::new(&mut *image_data);
        (0 .. self.width()).into_par_iter().for_each(|i| {
            let pixel_color = (0..self.samples)
                .into_iter()
                .map(|_| {
                    let ray = self.get_ray(i, j);
                    ray.color(world, self.max_depth)
                }).reduce(|acc, color| (acc + color))
                .unwrap_or(Color::black());
            self.write_pixel_mutex(&pixel_color, self.samples, &mutex, (i, j));
        });
    }
}
In the new implementation, all cores remain fully utilized until the end of the row, waiting at most for a few pixels to finish before moving to the next pixels row. This adjustment ensured a more even workload distribution and significantly reduced idle time.
Improvements
System
Ryzen 9 5950X
Render Settings
- Aspect Ratio: 16:9
- Width: 1200px
- Sample Count: 100
- Max Depth: 50
- Vertical FOV: 20°
- Focus Distance: 10m
- Defocus Angle: 0.6
Sample Parallelization: 1 minute, 20 seconds
Pixel Parallelization: 40 seconds
This represents a performance uplift of 50%.
Although the pixel-parallel implementation required a Mutex to synchronize access to the shared image buffer,
it turned out to be much faster overall. This change highlights the importance of finding
the right granularity for parallelization in computationally intensive tasks like ray tracing.
Technically, it would be possible to avoid using the
Mutexfor synchronizing access to the buffer, as each pixel is written to a preallocated memory address in the buffer, and no pixel will overlap with another. However, Rust prioritizes safety, and I opted to prioritize those safety guarantees over squeezing out a bit more performance.
Challenges and Learning Outcomes
The journey wasn’t without its challenges:
One of the biggest hurdles was adapting the object-oriented design from
Ray Tracing in One Weekend
to Rust’s programming style.
Rust doesn’t have traditional classes like an OOP language would, so I had to get
creative with traits and enums to replicate some of that structure.
This was a tough but valuable learning experience, as it helped me
better understand Rust’s strengths and how to work with its unique features.
Another challenge was Rust’s ownership model, especially when it came to managing shared scene data across multiple threads. It took some time to get used to how Rust handles memory safety and concurrency, but it ultimately helped me write safer and more efficient code. I had to use synchronization techniques like mutexes to make sure everything ran smoothly.
On the technical side, implementing ray tracing algorithms like ray-object intersections and material scattering involved a lot of trial and error. And since ray tracing is so computationally intensive, I had to constantly balance performance with code clarity.
Despite these challenges, the project was incredibly rewarding. It gave me a solid understanding of both Rust and ray tracing, and I feel more comfortable handling concurrent programming and diving into graphics development in the future.
Future Plans
Looking ahead, I’m excited to continue developing the ray tracer by working through the remaining two books in the Ray Tracing in One Weekend series.
With the experience I’ve gained in Rust, I plan to refactor the code to improve both its performance and readability.
I’ve worked with Vulkan in the past, but I’ve never used it with Rust or for ray tracing pipelines. That’s a challenge I’m eager to take on, as I aim to create a real-time rendering implementation that pushes both the algorithm and my graphics programming skills to new heights.
Conclusion
Building a ray tracer in Rust has been an immensely rewarding experience. Not only did I gain a deeper understanding of ray tracing and graphics programming, but I also became more familiar with Rust’s unique features, especially its ownership model. This model not only made me appreciate the language’s focus on safety and concurrency but also helped me understand move semantics in C++. It made me more aware of the strengths and weaknesses of C++ and how Rust’s approach offers certain advantages, especially when it comes to memory safety and managing concurrency.
This project has been a great way to dive into both Rust and ray tracing, and I look forward to continuing to develop the ray tracer with new features, optimizations, and challenges ahead.